Tools
E-SWORD
“The Lord’s sword with an electronic edge”
Spanish sites
Link to download the application or program in Spanish
E-Sword – English tutorial and resources
Bible versions
- Textual Bible (1999 Translation by the Ibero-American Bible Society ).
- Updated Reina Valera (Queen-Valera Version, 1989 revision).
- New International Version (1984 Revision, by International Bible Society ).
- Jünneman Holy Bible (literal Bible of the Catholic theologian Guillermo Jünemann).
- The New American Bible (By The Lockman Foundation , 1997 revision)
- Modern Version (1929 Version of Bible Societies in Latin America ).
- New World Translation ( Watch Tower Bible [Jehovah’s Witnesses], 1989 revision).
- Translation in Current Language (2010 Revision, United Bible Societies ).
- Bear Bible (Version of Casiodoro de Reina, from 1569) .
- Stendal’s Holy Scriptures (Rusell M. Stendal’s review of C. DeReina’s translation, 1569).
- Reina Valera 1865
- Reina Valera 1995
- God Speaks Today (1996 United Bible Societies Version ).
- New Hispanic Bible
- Greek-Spanish interlinear with Westcott and Hort text Greek-Spanish interlinear with Nestle-Aland text
- Peshita into Spanish (Spanish translation of the Aramaic text “Peshita”)
Bible dictionaries
- Hispanic World Bible Dictionary
- Glossary of biblical names
- Dictionary of figures of speech by EW Bullinger – F. Lacueva
- Robinson’s Dictionary of Morphological Codes
- Table of weights and measures of the Reina Valera
- Keys to biblical interpretation by T. de la Fuente
- Hebrew/Greek multilexicon with definitions of Strong – Chavez – Tuggy – Vine – Swanson
- Spanish translation of Strong’s Hebrew/Greek dictionary
- Strong’s exhaustive agreement
- Hebrew-Spanish Dictionary of Moisés Chávez
- Dictionary of Old Testament Hebrew Words – WE Vine
- Dictionary of New Testament Greek Words – WE Vine
- Tuggy’s Greek-Spanish Lexicon
- Concordance and Greek Spanish dictionary by Pedro Ortiz
- Greek words from the New Testament – William Barclay
Bible maps and charts
- Bible Atlas
- Access Foundation Bible Atlas
- Maps from the Caribe publishing house
- Maps and graphs of the textual Bible
- Jerusalem Bible Maps
- Scofield Bible Maps
- Maps of the Updated Reina Valera
- Maps of the Reina Valera 1995
- American Bible Society Maps
How to install and start using e-sword
Once the E-Sword and the resources that interest you have been downloaded, we proceed with the installation. First we will install it with its executable file, and then we will install each of the downloaded modules. Each plugin is executable and is self-installed in the directory where we have E-Sword installed.
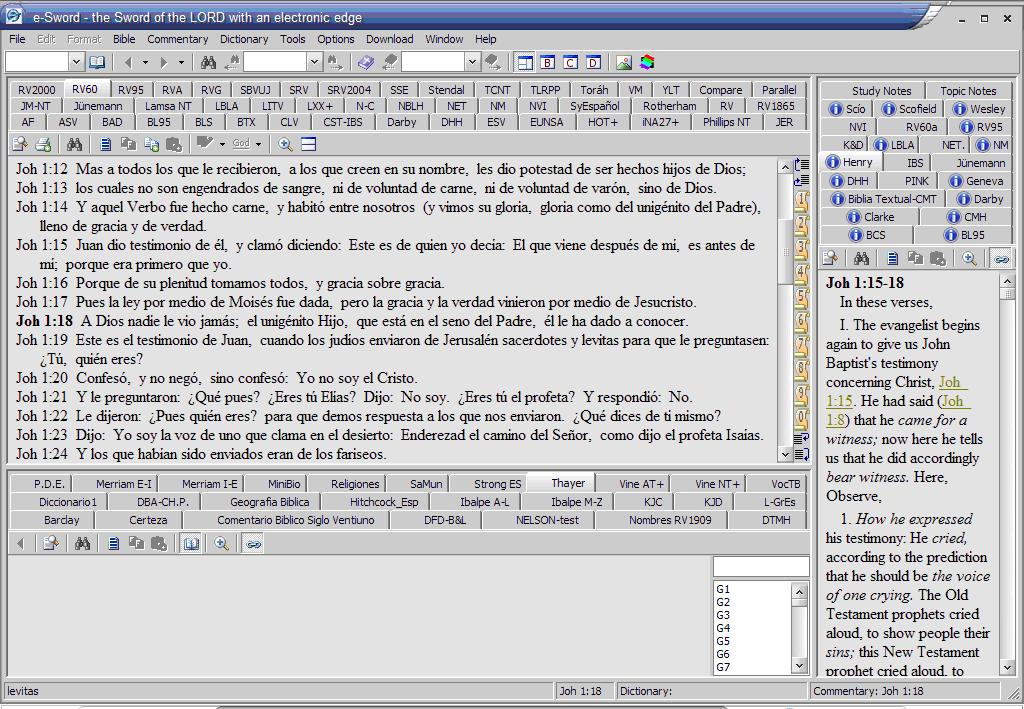
After installing the program and the add-ons, we will run the program. Something like this will appear:
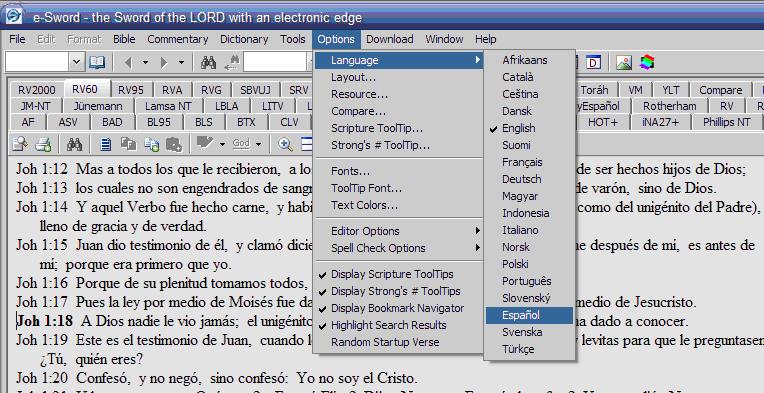
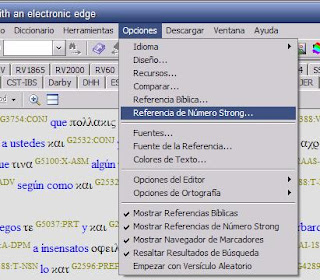
The first thing we will do is select “options” at the top and then, where it says “language”, we must select the desired language
Now that we have the menu in Spanish we will begin to explore the options.
ICON BAR
We will first see the function of the icons in the top bar:
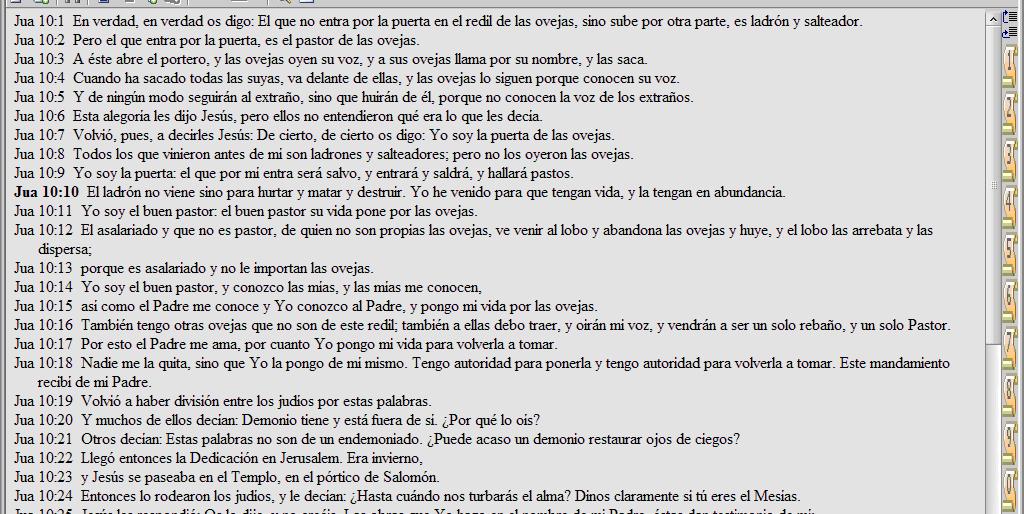
- Here we can manually enter a biblical reference that we want to reach. For example, if we put “John 10:10” (without the quotes) and then press “enter” the program will go to this biblical reference.
- By “clicking” here, a list of the books, chapters and verses of the Bible will be displayed and we will be able to select the reference we want to go to.
- In this section we can return to a biblical reference that we previously read by selecting the left arrow, and then we can return to subsequent references by pressing the right arrow. By clicking on the down arrow we will have a list of the biblical references that we have visited and we will be able to see some of them again.
- Pressing this icon will open the search box. There we can look up all the uses of a word in the Bible version in front. For example, here I show the search box for the 1960 Reina Valera version. I wrote down the word “love” and then pressed “search.” As a result I receive all the Bible verses in the RV-60 that contain the word “love.” In this box we have the option to search for single words, exact phrases, and parts of words. In addition, we can search the entire Bible, in the Old or New Testament, or narrow the search to a specific book of the Bible. We also have the option of copying the list of verses and then pasting it into another program such as “Word” or printing it directly.
- If we have searched for a word in the search box and then returned to the main screen, the list of words will be recorded in this sector and we can choose another reference to go to, or go directly to the previous reference (left arrow) or later (right arrow) that contains the word we have searched for.
- Selecting this icon will open a box in which we can create a list of verses that will be saved by the program with the name we give it.
- If we have created a list of verses, we can review it by selecting it in this space.
- Here are the display options for the “ E-Sword” screen
- Selecting this icon we will have the screen divided into three parts, displaying the Bibles, dictionaries and biblical commentaries simultaneously.
- Selecting this icon we will display only the Bible on the entire screen.
- Selecting this icon we will see the biblical comments on the entire screen.
- Selecting this icon we will see the Bible dictionary on the entire screen.
- Selecting this icon we will go to the maps and graphics section.
- Selecting this icon we will go to the “STEP Library reader” section, which are collections of books that must be downloaded separately.
Bible selection
By “clicking” on the “B” icon in the upper right, we will see the Bibles section. The labels we have at the top are the abbreviations of the different versions of the Bible that we have installed. Clicking on one of these labels will bring the selected version to the front.
If we select “Bible” in the menu and go down, where it says “information” , we will have some information about the Bible that is in front. Some versions of the Bible have included information not only about the year of translation and revision, but also about the translation criteria.
If we “click” on the left side, where the verse number is, that verse will be selected. This will serve to later see the comments on that verse or to compare the verse in different versions of the Bible.
On the right side we see a series of numbers. Each number is a Bible verse bookmark. Clicking with the right mouse button on one of the numbers will memorize the selected verse in that number. By clicking with the left button on a number we will go to the biblical reference that has been memorized in that number. As you can see, they can point to up to ten verses.
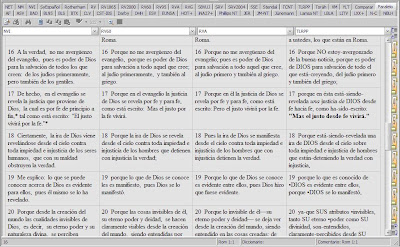
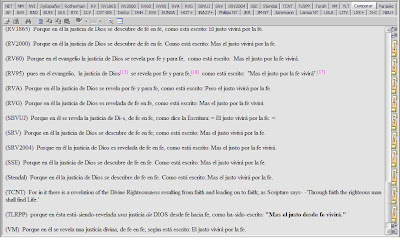
Among the labels of the Bible versions we will find one that says “Parallel”. Selecting this label a box will be presented in which we can select up to four different versions of the Bible and thus we can compare a section of the Bible between one version and another:
If we choose the label that says “compare”, we will be shown a comparison of the selected verse between all the versions of the Bible that we have installed
Some versions of the Bible have some numbers and letters that are used as references:
Comments section
Dictionaries section
Simulatenous display
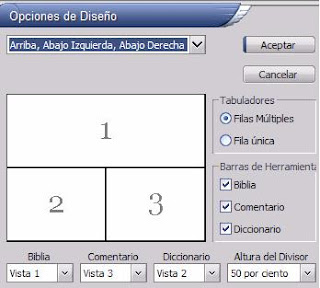
As we had already seen, we have an icon that gives us the simultaneous display of the Bible, the dictionary and the commentary. This display can be configured in the options section. To do this we will go to the menu, select “options” and then “design”. A box like the one I copied will appear. By “clicking” on the arrow at the top we can choose how we want the screen to be distributed.
Then, we can select which section we want to be seen in each frame of the screen and make other customization settings.
Resource selection
Personalization
In the “fonts” section of the options menu we can choose the font type and size for Bibles, dictionaries and commentaries. Where it says “text colors”, from the options menu, we can choose the colors for the text and the background. If you are going to work with the software for a long time, it is advisable to place a light gray background, which does not radiate as much light and is less harmful to your eyesight.
There are many more functions within E-Sword, but I believe that with these guidelines you will be able to begin using this program for reading, comparing and researching the Bible , the rest will come with practice!
If you have any questions or queries, you can contact me by email at: luisquispe14@gmail.com

